The ordering of new material and placing it into Stock requires several steps using the Warehouse feature:
oCreating a new Warehouse Purchase Order (P.O.)
oAssigning the P.O. an Investment Number (I.N.)
oAdding material to the P.O.
oAdding an invoice to the P.O.
oCommitting the order list
oDelivery of ordered material

Creating a New Warehouse Purchase Order
From the PurchaseOrderForm Actions button bar:
▪Click on the Create new option, which opens up the Create new PurchaseOrder popup window
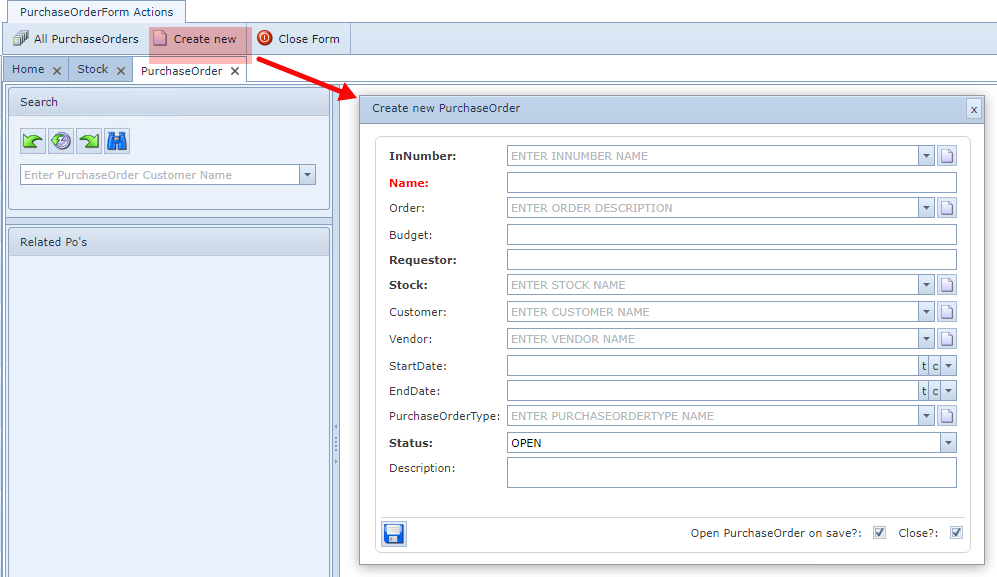
Fill in the required fields and in particular the mandatory ones:
▪Select the required InNumber field from its dropdown list - or create a new one by clicking on the new icon (page). Typically the Investment Number instance will, or should have already been created as part of the financial or budgetary process.
▪In the Name field, give this P.O. an appropriate name or code
▪The Requestor field can be the name of the requesting department, responsible persons name, or the API interface identifier where network to warehouse automation is implemented.
▪The Stock chosen from the dropdown list will be associated with this P.O.
▪The last mandatory field, Status, can be left as OPEN, which is the default option.
There are 3 options in the Warehouse P.O. Status field:
OPEN |
The P.O. is active and still being worked on, not all materials have been delivered and invoices remain unpaid |
PENDING |
The P.O. is in the system, but is not yet started or received by the Warehouse team |
CLOSED |
The P.O. is completely processed, materials delivered and booked in, and invoices are paid |
Adding material to the P.O.
From the PurchaseOrder tab:

1 |
Click on the Add tab |
2 |
Filter for and select the required material type item for the purchase order - enable the item in the first column of the required line item |
3 |
From the PurchaseOrderForm Actions button bar, select the Add material to PO option |
NOTE: for multiple material type selections, and if the quantity for each Material Type item on the P.O. is to be different, then repeat steps 2 and 3 above for each individual Material type item - as the resulting popup window will require one quantity field to be filled in. - refer to the next screen shot
This will open up the Add Material ... popup window
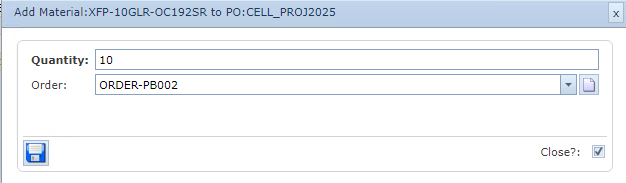
▪Type in the Quantity field the required number for the Material Type item
▪It is also recommended to search for and select the related Warehouse Order from the Order field dropdown list
Once complete:
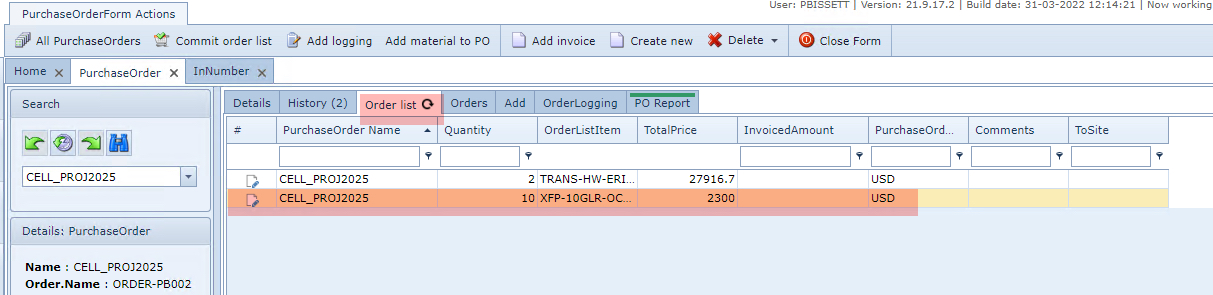
▪Click on the Order list tab to verify Material Type selections for the P.O.
Adding an invoice to the P.O.
From the PurchaseOrderForm Actions button bar:
▪Click on the Add invoice option, which opens up the Add invoice popup window
Fill in the required fields, in particular the mandatory ones.
▪Click on the Save icon in the lower left corner of the popup window
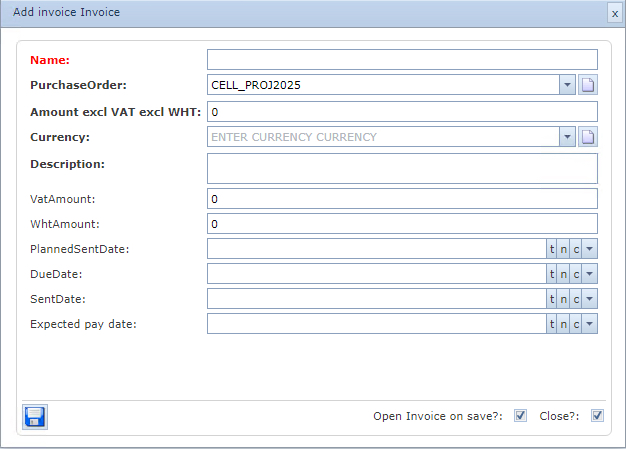
The following table gives a brief description of the fields contained in the popup window.
Name |
Invoice name or code |
PurchaseOrder |
This should be auto populated with the P.O. name, where it was deployed from |
Amount excl VAT excl WHT |
This is the net value of the invoice - no taxes included. |
Currency |
Dropdown list of several currencies. These can be administered from the Combo Box Data feature in the IMS System Menu |
Description |
A free form text field for describing the invoice |
VatAmount |
Numerical field to include any VAT value |
WhtAmount |
Numerical field to include any Witholding Tax value |
PlannedSentDate |
Proposed date when the invoice will be sent to purchaser of the material |
DueDate |
Due date of payment |
SentDate |
Actual date invoice was sent |
ExpectedPayDate |
Expected date of payment |
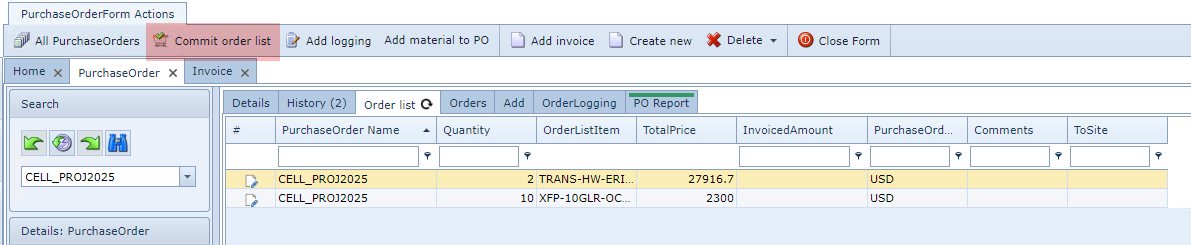
Committing the order list
One of the final steps of getting the ordered material into the required Stock section of the Warehouse, is to commit all the material listed in the P.O.
From the PurchaseOrderForm Actions button bar:
▪Click on the Commit order list option
In the lower right corner of the window you will receive a successful notification.
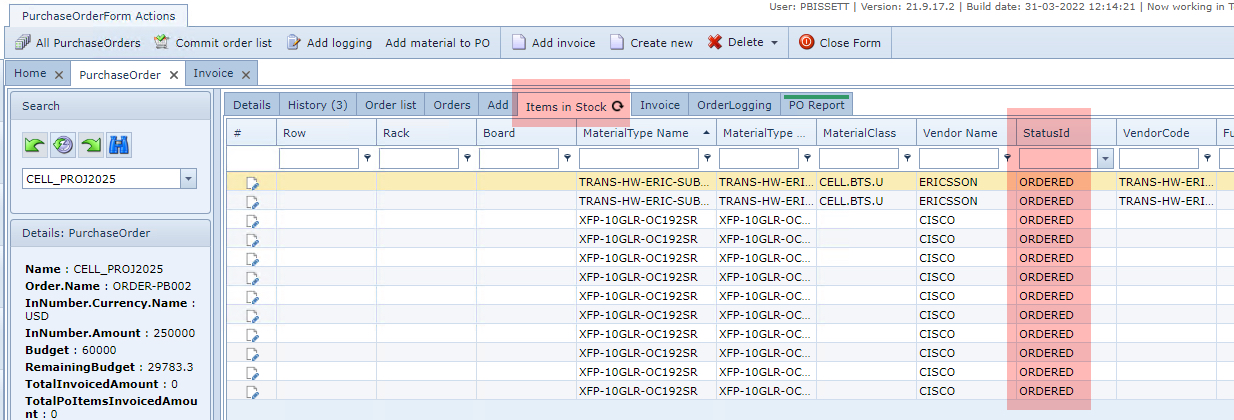
To confirm the material items are designated to be In Stock:
From the PurchaseOrder tab:
▪Click on the Items in Stock tab
All material items are listed (12 in this example) but notice the StatusId column. It is important to know that they are on order, and are yet to be received and booked into Stock. This will be covered in the next sections; Processing the delivery of ordered material.
Delivery of ordered material
When the material arrives from the vendor or supplier to the warehouse site, a two step process is applied from the Stock feature; Book-in and Update.
It makes sense to filter the Stock instances by P.O. to reduce the number of Stock material type items from view. Also be aware that it is possible that only a partial delivery has been received relating to a P.O. and so only those items delivered will be booked in and updated.
In the example given here, the handling of a partial delivery is shown.
From the StockForm Actions button bar:
▪Click on the Stock item Action option, which opens up the Stock item Action popup window
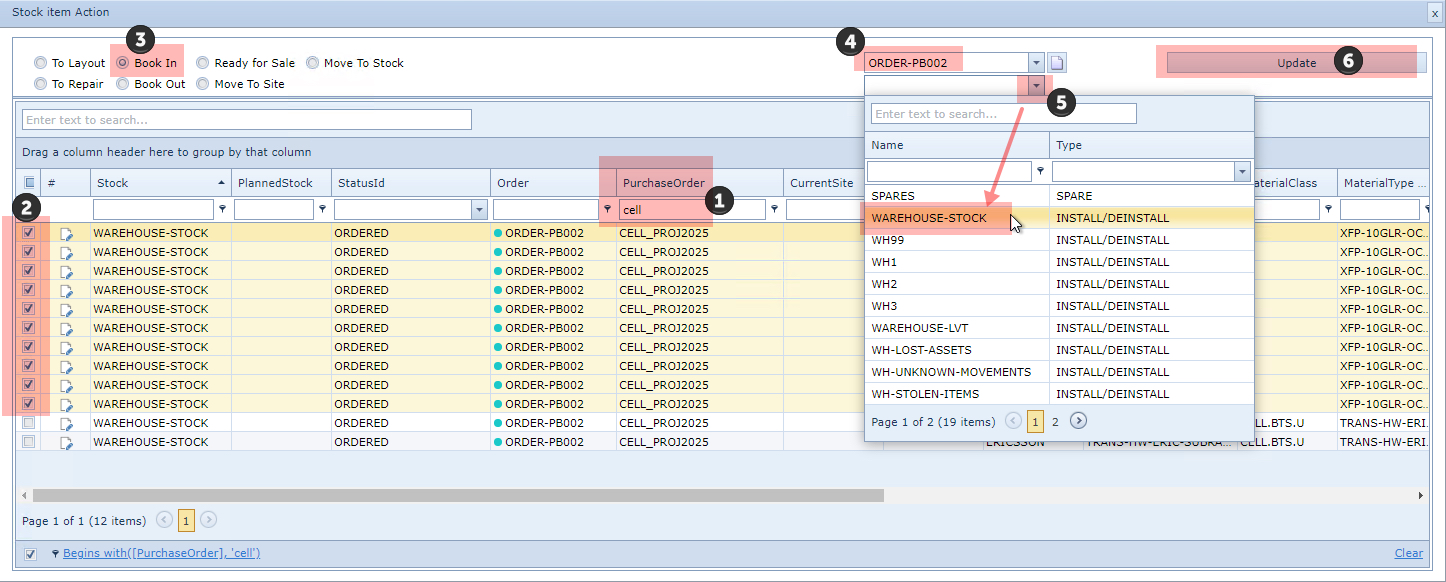
1 |
In the PurchaseOrder column filter field, type in the required P.O. name |
2 |
Determine which Material Type items have been delivered and enable their first column tick boxes (per line item) |
At the top of the Stock item Action popup window:
|
|
3 |
Enable the Book In radio button |
This will reveal 2 extra drop-down fields which require the related Order description (separate from the P.O.) and the Stock name (the location or logical Warehouse partition)
|
|
4 |
Search for and enter the Order description field |
5 |
Search for and enter the Stock name field |
6 |
Click on the Update button in the top right corner to complete the process |