This section will explain how material is taken out of stock i.e., for use in the network, other sections deal with
selling material and returning material to the vendor i.e., defective material.

In this section the following is explained:
oMoving warehouse material using the Reserve, Layout, and Bookout method
oMoving warehouse material using the Move To Site
oExpanding further using the 'Move To Site' and 'Move To Stock' options
It is possible to move material from the Warehouse stock to the Network (IMS Inventory) in a couple of ways,
and both have their preconditions in doing so:
Method 1: Reserve, Layout, Bookout
There are 3 main steps for material leaving Stock; reserving material, layout material, and book out material.
The following instructions are for material leaving Stock to be delivered to the Network
Reserving Material
Reserving material is made by selecting the Stock option from the Warehouse module in the IMS Main Menu.
Material reservations can be made regardless of whether they are in stock, in order (on order) or not in stock at all.
The following priority is followed by the Warehouse system when selecting material items for reservation:
1.In stock
2.In order
3.Out stock (negative stock)
Note: Reservations are made based on the material type name and not so much the actual material item in the database. This is useful when for example reservations are made on high volume material items, like SFPs, that contain a serial number. The serial number is assigned at a later step in the process.
Refer to the next screenshot for the following actions:
▪Search for and select the required Stock Name from the Search area, in this example it is Warehouse-Stock
▪Use the filter field In the MaterialType Name column to locate the material to be reserved (xfp in this example)
Take note of the quantity in the InStock column to ensure sufficient material is available for reserving for immediate dispatch situations.
From the StockForm Actions button bar:
▪Click on the Reserve Materials option, which opens up the Reserve Materials popup window
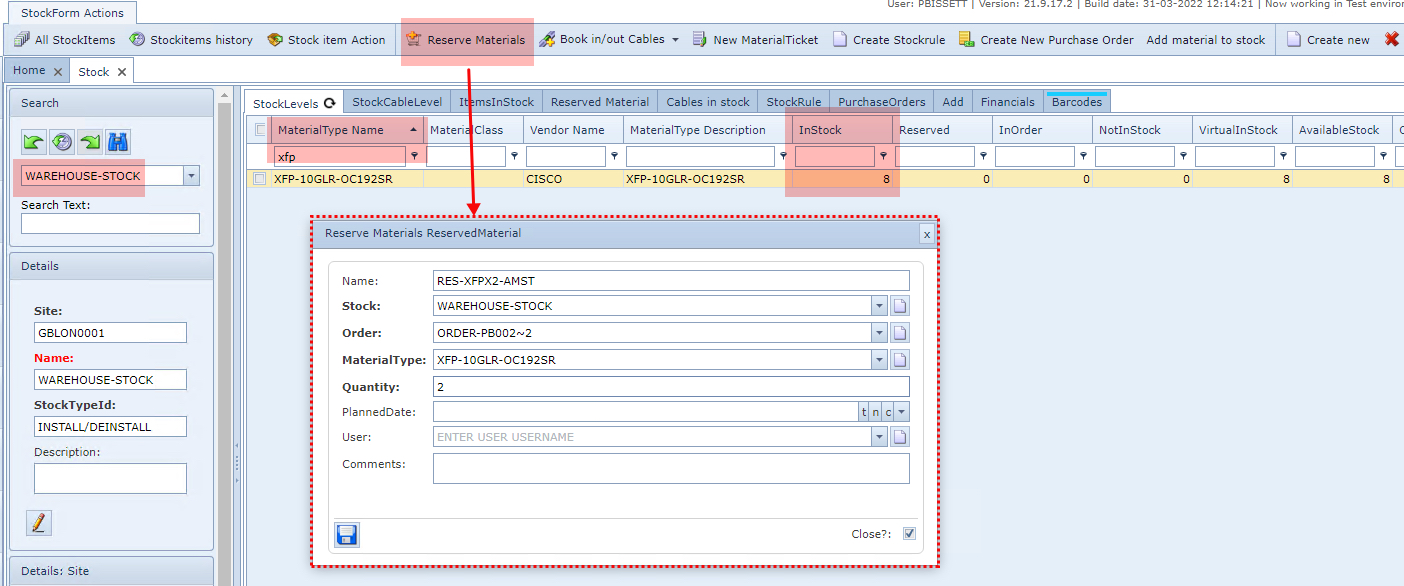
▪Fill in the required fields, in particular the MaterialType and Quantity as well as all other mandatory ones
▪Make sure the correct Stock is selected in the Stock field
▪Ensure that the Order field also has an appropriate Order name associated with this reservation
▪Click on the Save icon in the lower left corner of the popup window
The Reserve Materials form contains the following fields:
Field name |
Description |
Required? |
Name |
Name of the material reservation for later reference |
Optional |
Stock |
The stock containing the materials |
Mandatory |
Material Type |
Name of the material type |
Mandatory |
Order |
Order number |
Mandatory |
Quantity |
The number of material items to be reserved |
Mandatory |
Planned Date |
Additional information text field |
Optional |
Username |
Additional information text field |
Optional |
Comments |
Additional information text field |
Optional |
NOTE: An association will be made with this reservation and the next step of laying out of materials, when it comes to selecting the dropdown field called ReservedMaterial User.
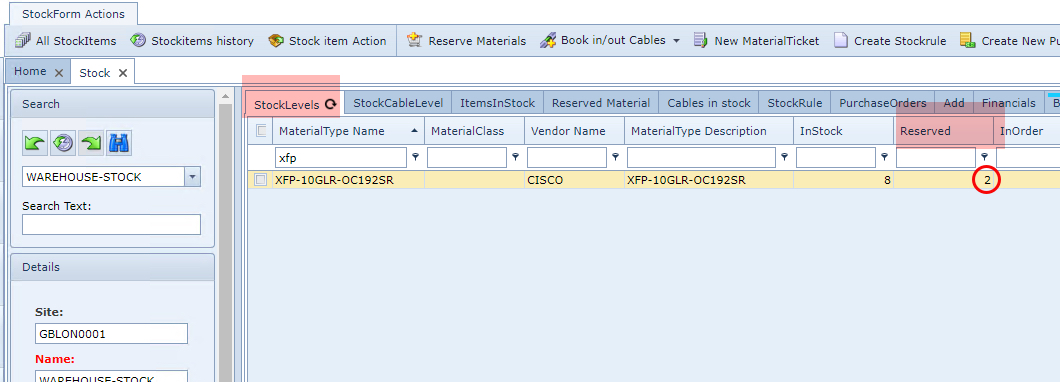
Confirmation of the reserved material can be seen in either the StockLevels or Reserved Material tabs and filtering for the required Material Type if needed. Notice the Reserved column in the screenshot below.
Layout Material
This step in the process is to set (reserved) material items to layout, which means that they are ready to
be picked up for installation.
For high volume material items containing serial numbers, like SFPs, it is advised to skip the layout step
and to directly book out these material items as explained in the next section called Bookout.
The next set of steps involves the Material Layout process. Consider this as a form of a picking list preparation.
From the StockForm Actions button bar:
▪Click on the Stock item Action option
This opens up the Stock item Action popup window

▪Select the material type instances to layout from the first column check box - in this example 2 items are laid out
▪Click on the To Layout radio option - this lists only material items that are "in stock"
▪In the dropdown field called MaterialTicket Name, select an existing instance or create a new one
▪In the dropdown field called ReservedMaterial User, select the required instance - this will relate to the associated action carried out in the previous Reserving Material section
▪Click on the Update button option in the top right corner
Bookout Material
The final step in this section is to book-out the 'picked' material (either through the reservation/layout steps or directly from stock), to be sent to the appropriate network site.
From the StockForm Actions button bar:
▪Click on the Stock item Action option
This opens up the Stock item Action popup window and will list all material items with the status “in stock” and “lay out” and in a very similar way to the Layout Material section:

▪Select the material type instances to layout from the first column check box - in this example 2 items are laid out
▪Click on the Book Out radio option
▪In the dropdown field called Order Description, select an existing instance or create a new one
▪In the dropdown field called Site name, select the required destination Site
▪Click on the Update button option in the top right corner - which will change their status to "Out Stock"
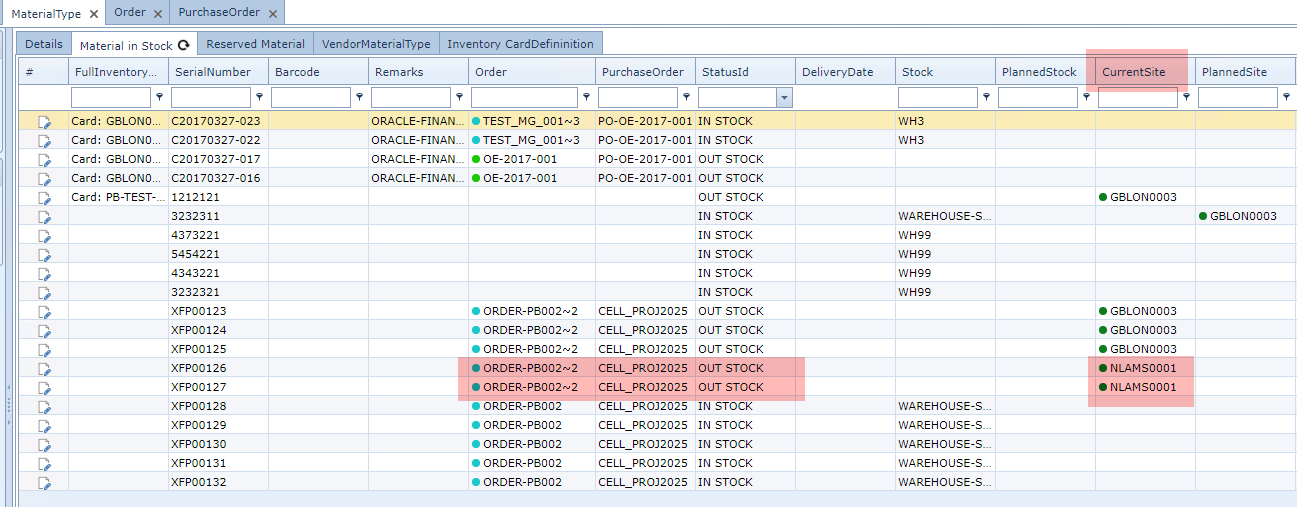
Several confirmation methods will show how the booked out material looks now in both the warehouse and IMS Site inventory:
From the Warehouse module select the Material Type module and then select the Material in Stock tab and under the CurrentSite column, the related destination Site name can be observed.
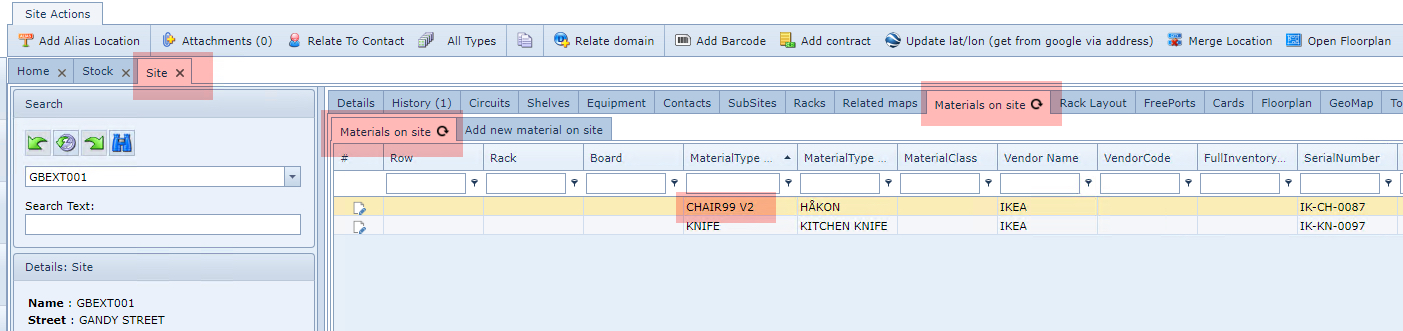
From the IMS Inventory Site module, search for and select the destination Site, then select the Materials on Site tab which will reveal the recent items transferred (booked out) from the Warehouse.

Method 2: Move to site
These are the steps to follow using this method, with a condition that the material to be moved must be
in a status of In Stock to begin with.

From the StockForm Actions button bar:
▪Click on the Stock item Action option, this open up the Stock item Action popup window
▪Locate the required MaterialType from the list of items provided - use the filter columns to facilitate the search - in this case the StatusId of In Stock and Order detail is used - see the above screenshot.
▪Select the Material Type (multiple selections is possible) by enabling the corresponding Tick Box in the first column
▪In the available Radio button options given in the top left of the popup window, select Move To Site
▪Fill in the relevant two dropdown fields of Enter Order Description and Enter Site Name next to the Update button in the top right of the popup window
▪Click on the Update button to complete this first phase
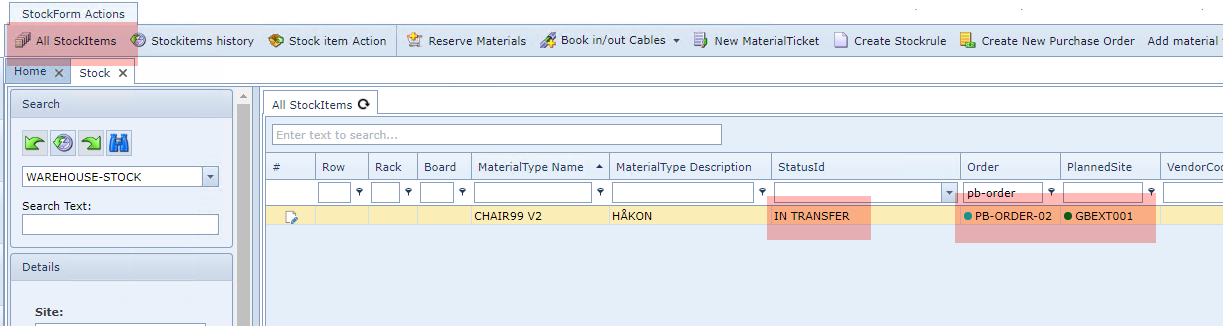
To confirm the above process was successful, verify the material item's status in the All StockItems option as shown in the following screen shot:
Notice the Status Id of In Transfer
The next set of steps will take it from an In Transfer status to Out Stock status, meaning that as far as the Warehouse system is concerned, the material item is on its way to leaving the Warehouse stock.
The steps to follow are similar to the ones just above, but look for the item with the In Transfer status and then select the Book Out radio button - as shown in the following screen shot.
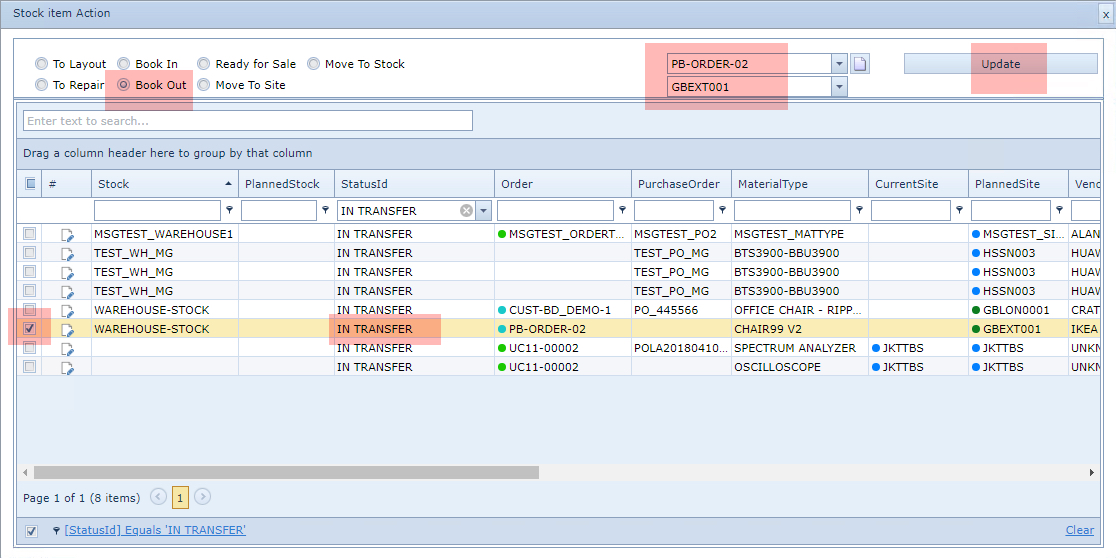
This will cause the item's status to go from In Transfer to Out Stock, click on the refresh icon in the All StockItems tab title as show in the next screen shot.

A final validation that the material item is now registered as part of the IMS Inventory, can be be made from IMS Inventory by pulling up the relevant Site instance and then from the Materials on site tabs, locate the material item - as described in the screenshot below.
More on the 'Move To' options
Two more points worth mentioning regarding moving Warehouse material are:
oIt is possible to move a Material item from one IMS Inventory Site to another - without the full process of booking it back in to Warehouse etc., using the Move To Site radio button option,and to
omove material from one Stock location to another Stock location within the Warehouse using the Move To Site radio button option i.e., In Stock items that are missing and presumed stolen, might be transferred to Missing or Stolen Stock
Refer to the following 2 screen shots for examples, noticing the radio button option differences as well as the drop down field representing either the Site or Stock instances available to move items to.
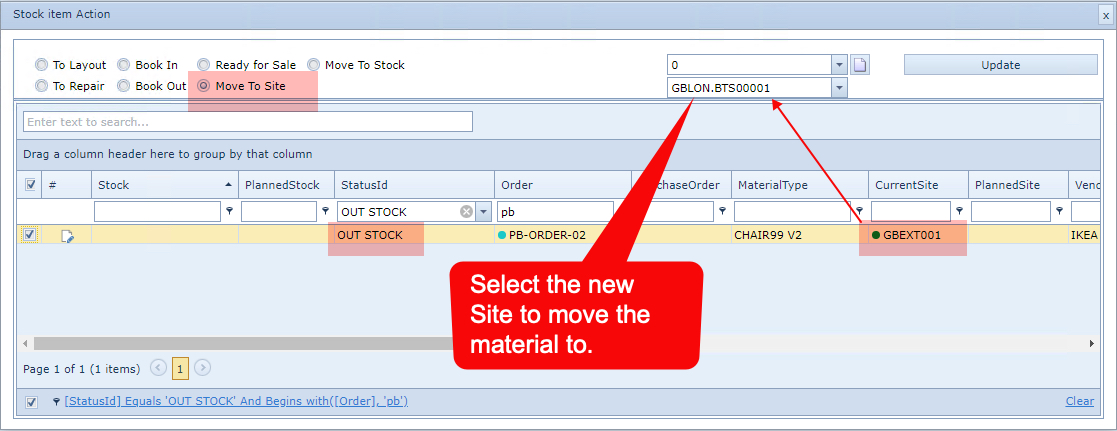
Moving material from one IMS Site to another, using the Move To Site radio button option

Moving material from one Warehouse stock location to another, using the Move To Stock radio button option