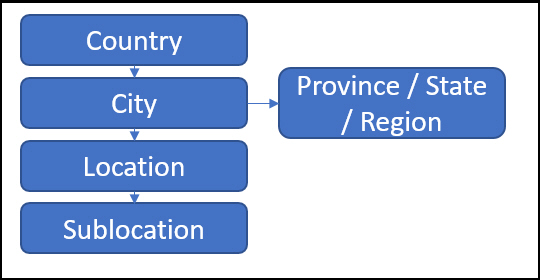
The Sites form is where the locations are registered in IMS. A site can be a building, shelter, rooftop
hand/manhole or a room within a building. Each site must have a unique name.
In case of a room in a building, the building will be the “parent” site of the room and the room a “child”
site of the building. A room has a related room name and is related to a floor.
If so desired, a site can have multiple "alias" names.
Each site will be related to a city, which is related to a country. A city may be related to a province
and/or district, but this is not mandatory.
Open Site Form
To open the Site Form, use the menu on the left of the screen.
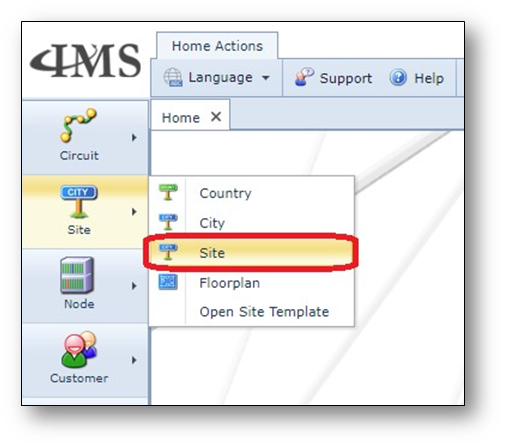
The site form will be opened.
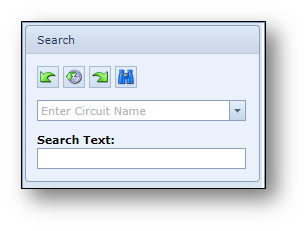
Find Site
To find a site in the Site Form, use the search field.
Sites Actions button bar
Once a site is opened, the sites action button bar is visible.
![]()
Add Alias Location |
Add an alias name to the Site opened |
Attachments |
Add an attachment to the Site opened |
Relate To Contact |
Relate the Site opened to a contact |
All Types |
List all Site types |
New Site Type |
Create a new Site type |
Add contract |
Add a contract to the Site opened |
Update lat/lon |
Update the coordinates of the Site based on the address details |
Merge Location |
Merge 2 sites which are the same site, but have different names |
Open Floorplan |
Open the Floorplan of the Site |
New |
Create a new Site |
Delete |
Delete the Site opened |
Close Form
|
Close the Site form |
Create a new site
To create a new site, select the “Create new Site” option (use the small arrow next to “New”)
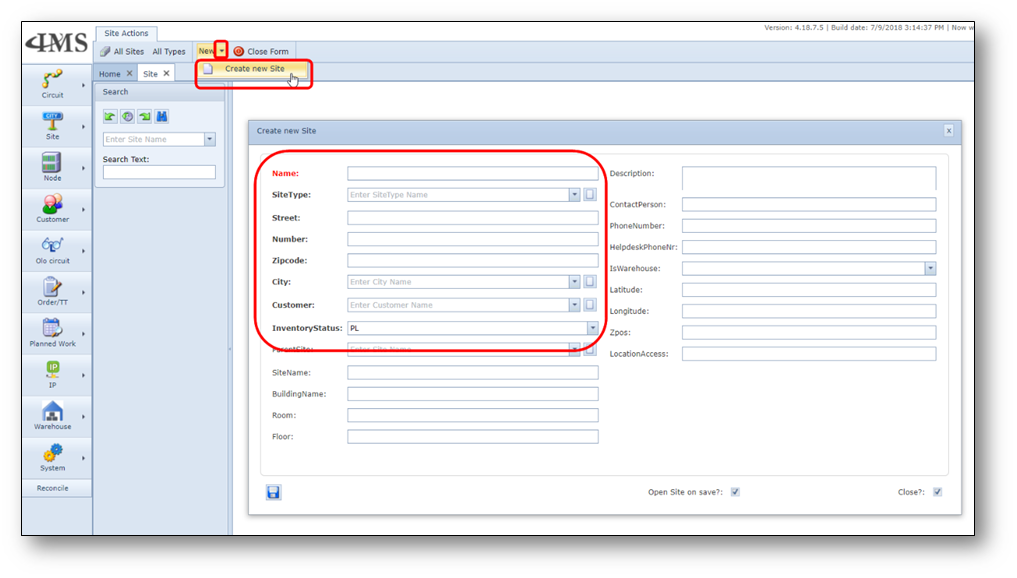
Fill in the details and press save.

Update the coordinates of the new Site
1.Find the newly created site (if it is not already opened).
2.Click the “Update lat/lon (get from google via address)” button.

3.Note that the Latitude and Longitude fields now have coordinates.
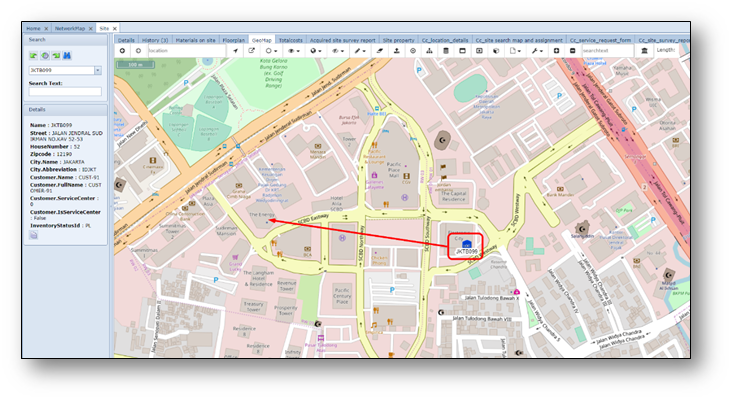
4.Go to the “GeoMap” tab to view the Site’s location on the map.
5.Drag the location icon (click first the icon with left mouse button) from the original
6.location to the correct geo position, as per example screenshot below.
Screenshot: view GeoMap
Create a new Site as sublocation
Below the steps for creating a sub-site (room) within the building that is already created before.
1.Click the “Create new Site” option located under the “New” button on the Site Actions bar.
2.Fill in the following details
Name |
Name of the subsite. Fill in later ! – first do parent site field |
ParentSite |
The Building Site (must already exist in database, otherwise create this first. |
SiteType |
This is the type of site, for example CORE, ACCESS, Customer, etc |
Street |
Already filled in |
HouseNumber |
Already filled in |
ZipCode |
Already filled in |
City |
Already filled in |
Customer |
Already filled in |
InventoryStatus |
status of the subsite, for example “PL” for planned and “IS” for in service. |
Room |
fill in the room name |
Floor |
fill in the floor number/name |
Name |
fill in the name of the room site. |

3.Click the “Save” button to create the new Site.