Material Type
The following steps show how to add new Material Type to the Warehouse system.
As mentioned previously in this chapter, the Warehouse system holds a separate library of equipment types and are typically set up independently of the IMS inventory types, depending on how the Warehouse functionality will be used.
Access Material Type
From the IMS Main Menu:
▪Click on the Warehouse module, followed by the Material Type option in the drop down list provided.

This opens up the Material Type form.
Search for Material Type
Once the Material Type form is opened, the Search field is available to locate existing instances of Material Types, either by typing in the name of the Material Type or by selecting it from a list provided by the dropdown icon.

Create new Material Type
From the MaterialTypeForm Actions button bar:
▪Click on the Create new option, which opens up the Create new MaterialType popup window

▪Fill in the required fields of information, in particular the mandatory ones
▪Click on the Save icon, in the lower left corner of the popup window when finished.
The Details tab of the form contains the following fields:
Field name |
Description |
Requirements |
Name |
Name of the material type |
Mandatory and unique |
MaterialClass |
Can be used to categorise materials into classes |
Optional |
Vendor |
Vendor or manufacturer of the material |
Mandatory |
VendorCode |
Code of the vendor |
Optional |
Version |
Version of the material |
Optional |
Price |
Purchase price |
Mandatory, but can be 0 should finances be managed outside of IMS |
Currency |
Related currency of the material's price |
Mandatory |
DepreciationDays |
Period of depreciation in number of days |
Optional |
Description |
Additional details of the material type |
Mandatory |
SerialNumberRequired |
Define if the material type has a serial number which should be registered upon delivery. Not advisable for fast moving and/or high-volume materials |
Mandatory |
Supplier |
Supplier of the material |
Optional |
Deliverable |
Field to indicate if the material is deliverable yes/no |
Mandatory |
MinQuantity |
Minimum quantity in stock |
Optional |
EndOfSale |
End of sale date |
Optional |
EndOfService |
End of service date |
Optional |
DefaultMaintenanceCycle |
Period after which maintenance should be performed in days |
Optional |
ReplacedBy |
Field to indicate a replacement should material not be deliverable anymore |
Optional |
AutoTrackingTo |
Option for use with Auto Discovery capabilities - see separate paragraph below called Auto Tracking |
Optional |
Width |
Width of the material type - when this item is placed in a floor-plan |
Optional |
Depth |
Depth of the material type - when this item is placed in a floor-plan |
Optional |
Auto tracking
This feature is used when IMS Inventory and Warehouse are synchronised using the Network Discovery process. If this automation level is implemented, then the process of warehouse Material Type status updates can take place with little or no human intervention.
One use case can be where Auto Discovery is run in the network, and equipment serial numbers from the network can be compared with Warehouse material serial numbers, then Status Ids in the Warehouse can be automatically updated in the Warehouse to represent the true status in both records.
For example, consider a material type for a particular card in the Warehouse that shows a status of IN STOCK. An Auto Discovery run has revealed that the same item in the network (same serial number) is showing a status of IS (In Service). If the AutoTrackingTo feature is implemented, then the Warehouse system will adjust the status of its material item to OUT STOCK.
Furthermore, if an Auto Discovery run reveals a series of new serial numbers that relate to a Material Type definition of, say, Card Definition then the Warehouse system can add these new network items into its stock levels, giving them the same serial numbers and a Status Id of IN STOCK - indicating that these can now be used and further tracking can take place.
In summary then, the Auto Tracking feature can be particularly useful for customers who want to take advantage of life cycle asset tracking but not worry about excess staffing for the Warehouse module, in other words, a minimal amount of administration is required to log in new material and then book it out to the network and book it back in when returned for repairs, replacement, disposing, or selling it on once its cycle is complete.
For more detailed information on this feature, please contact VC4 at https://www.vc4.com/contact/
Relating Warehouse and IMS Inventory Material Types
There are 2 important mechanisms to note if the Material Types in the Warehouse are to be tracked and synchronised with their counter-parts in the regular IMS Inventory, these mechanisms are:
o the warehouse's material type's registration with the IMS Network inventory
o and its Serial Number
These mechanisms can be seen in the following 3 screen shots:
1 - Associating Warehouse Material Type with Inventory Definition Types
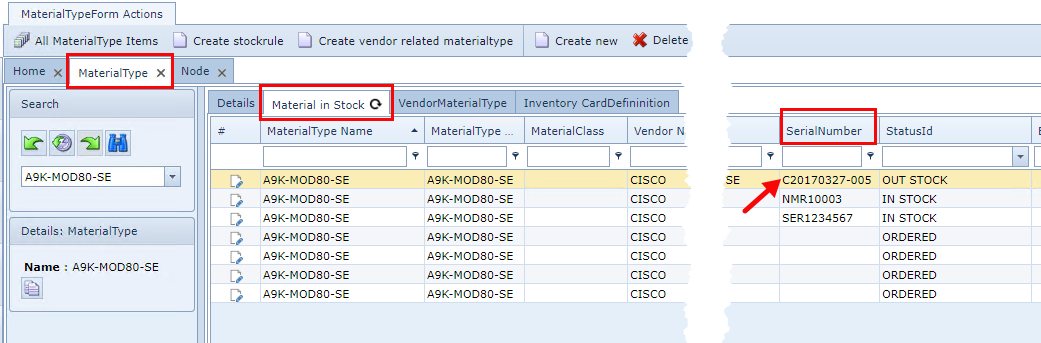
2 - Allocating individual Material Types with their unique Serial Numbers

3 - Associated Serial Number as seen from the IMS Inventory - Card object
As an example, if a warehouse Material Type item leaves the warehouse system and is sent to be used in the Network, then one should note that the item's status in the Warehouse system goes from being IN STOCK to OUT STOCK - once it is processed through the warehouse booking out method. Refer to screen shot number 2 above.
From then on, that same item will undergo several status changes in the network through its network life cycle i.e., it might start off with a status of IS. Should a fault occur with that item and it necessitates a status change, then that network status change will be reflected back to it's warehouse record as well.
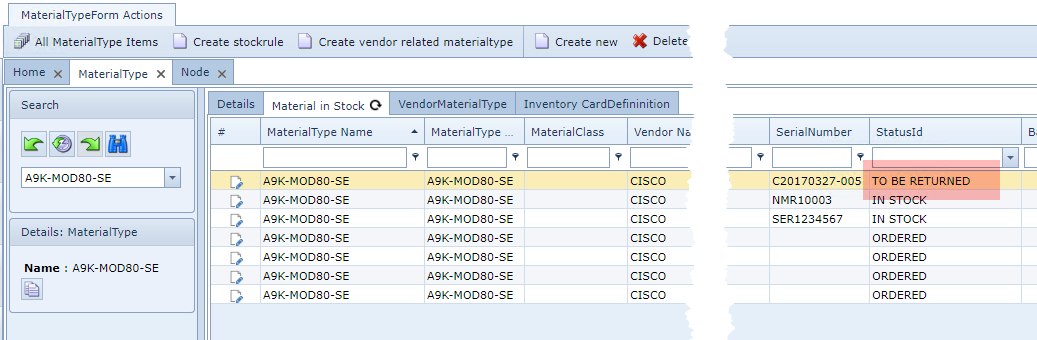
For example, if the network item has now been placed into a Status Id of RFC (request for cease) or OOS (out of service), then in the warehouse, that related item's record (stock) will also change from OUT STOCK to TO BE RETURNED. Refer to the screen shot below.
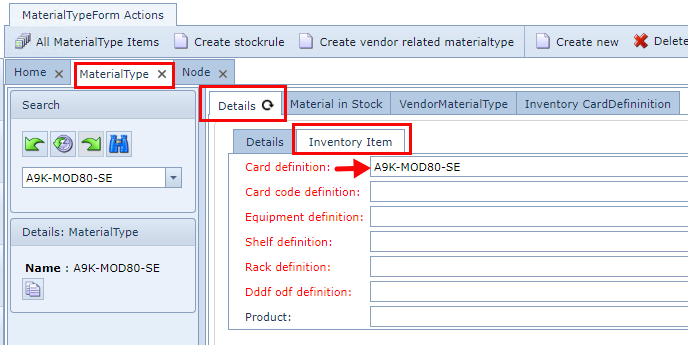
Inventory Item tab (relating Warehouse to Inventory Material Types)
The following table describes the field options with which to relate a warehouse Material Type with a corresponding IMS Network object.

Field name |
Description |
Requirements |
Card definition |
Relate material type to a card type |
Optional |
Card code definition |
Relate material type to a card code type |
Optional |
Equipment definition |
Relate material type to a node type |
Optional |
Shelf definition |
Relate material type to a shelf type |
Optional |
Rack definition |
Relate material type to a rack type |
Optional |
Ddf odf definition |
Relate material type to a DDF or ODF type |
Optional |
Product |
Additionally, relate material type to a product code |
Optional |
Material Templates
Ordering material is not always based on a single item. Many times, it is necessary to order material as a package of separate items based on a certain configuration. Consider a network router or switch, which requires a minimum baseline configuration of say a controller and two or three different interface cards, SFPs, power and network leads. Another case could be a Base Transceiver Station (BTS) which contains a large list of related items from antenna poles to power generators and batteries.
By creating a one-time material template, all items in such a configuration can be ordered in one go, every time the configuration is needed.
Accessing the Material Template
From the IMS Main Menu:
▪Click on the Warehouse module, followed by the Material Template option in the drop down list provided.
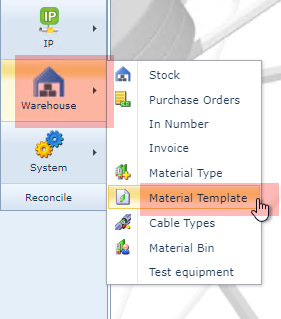
This opens up the Material Template form.
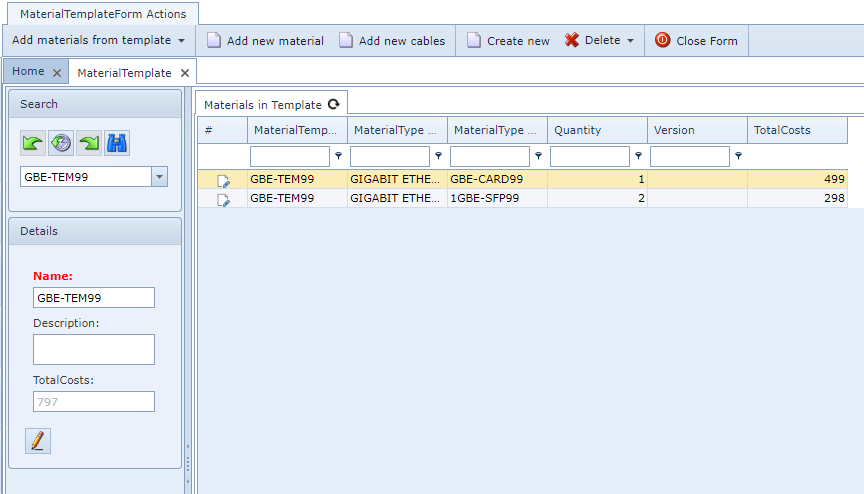
The following screen shot shows an existing Material Template instance containing 2 Material Type items along with their quantities and cost details
Create a Material Template
From the MaterialTemplateForm Actions button bar:
▪Click on the Create new option, which opens up the Create new MaterialTemplate popup window
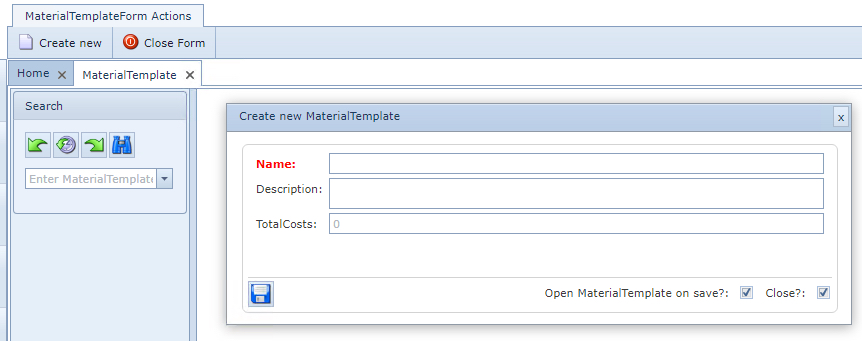
▪Fill in the required fields of information, in particular the mandatory one
▪Click on the Save icon, in the lower left corner of the popup window when finished.
The popup form contains the following fields:
Field name |
Description |
Requirements |
Name |
Name of the template |
Mandatory and unique |
Description |
Brief description of the template |
Optional |
Total Costs |
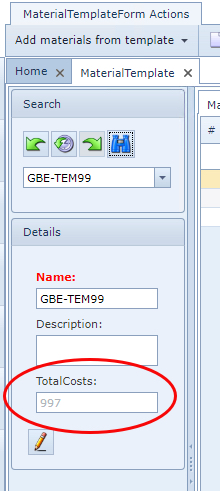
The total price of all items in the template - see the screen shot below showing where this field is displayed within the Material template form |
Read only - calculated by the Warehouse system |
After creating the Material Template, materials can be added to it.
Add new Material or Cables
With the required existing Material Template opened and from the MaterialTemplateForm Actions button bar:
▪Click on the Add new material or Add new cables option, which opens up the Add new MaterialInTemplate popup window

▪Fill in the required fields of information, in particular the mandatory ones
▪Click on the Save icon, in the lower left corner of the popup window when finished.
The popup form contains the following fields:
Field name |
Explanation |
Requirements |
MaterialTemplate |
Name of the template |
Non editable |
MaterialType |
A list of materials per vendor |
Mandatory |
Quantity |
The number of pieces for the selected material |
Mandatory |