The Orders form is where the orders are registered. Most objects in IMS require the relation to an
order number. This chapter covers the basics of the Orders functionality to be able to create objects in
IMS, the more advanced Orders functionality is explained in a later chapter.
Open Order Form
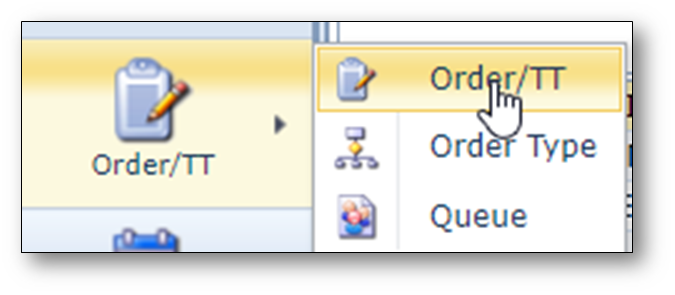
To open de order form, go to the “Order/TT” option in the menu bar on the left and chose option
Order/TT.
Find order
To find an existing order, use the search area on the left.
The search area is present on all forms in IMS and offers an easy and standardized way in navigation
through the objects on the forms.
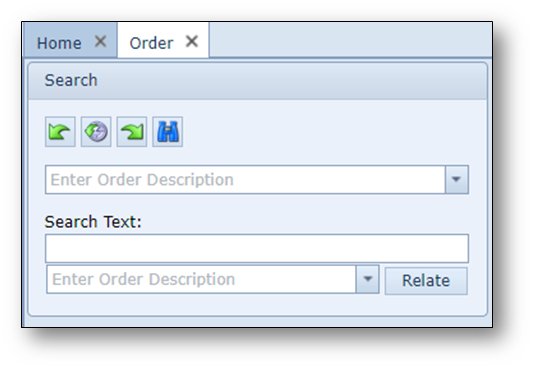
The lowest pull down field below the search text field is not used for searching.
This field is for relating one order (or trouble ticket) with another order (or trouble ticket).
Orders Actions button bar
Once an order is opened, the following menu bar is visible.
Note: when the order form is empty, not all buttons are visible.

All running orders |
Show all active orders in a list |
Stop clock |
To (temporarily) stop/restart the clock/“lead-time” |
Accept |
Accept an order/task into your queue |
Assign |
Assign an order/task to another user (in your department queue) |
Dispatch |
Dispatch an order/task to another queue |
Yank |
Yank (grab) an order/task from anywhere into your queue |
Reject |
Reject an order/task back to its previous task/queue |
Close |
Close an order/task |
Skip |
Skip a task in a workflow |
Un-Skip |
Undo the skipping of a task |
Close complete |
Close the complete order including all tasks |
Cancel |
Cancel an order/task |
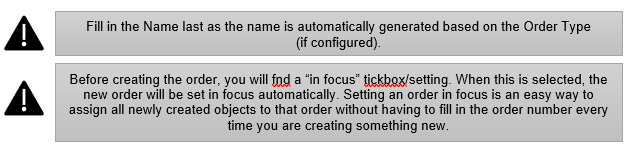
Put order in focus |
Put an order in focus |
Create or update B.O.M. |
Create or update the bill of material based on the related objects to an order/task |
Relate objects |
Relate objects (circuit, node, etc.) to the order |
Copy |
Copy the order number |
KMZ |
Create a KMZ-file based on certain related objects to the order |
Add logging |
Add log notes to the order |
New |
Create a new order |
Delete |
Delete the order |
Close form |
Close the Order form |
Information in the Order Form
After an order or Trouble Ticket is opened in the Order Form the following sections are available.
Below a short explanation per section.
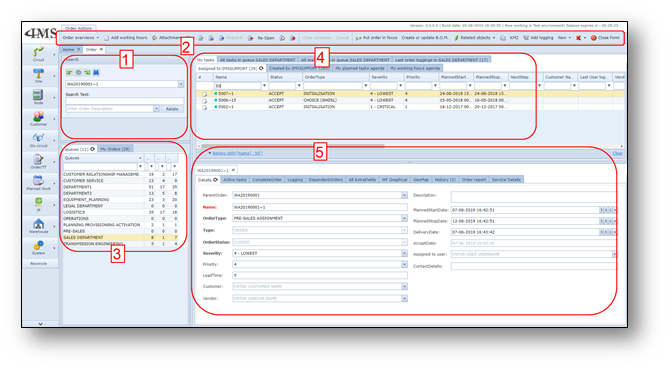
Section 1:
Search area, to find and relate orders.
Section 2:
Order Button bar
Section 3:
Overview of queue the IMS user (you) is member of.
It lists all the queues (this may be one or multiple), and per queue:
InQueueCount |
Number of orders/TTs that are currently in this queue |
OpenAssignedCount |
Number of order/TTs assigned to queue members |
OpenUnAssignedCount |
Number of order/TTs NOT assigned to queue members |
Section 4:
This section lists multiple tab pages. Below a short explanation per tab page
My Tasks:
This tab page gives information about the current tasks assigned to the IMS user (you).
It shows multiple sub-tab pages:
Assigned to: <user name>:
List of order/TT tasks currently assigned to the IMS user (you).
Created by:
List of orders/TTs created by the IMS user (you)
My planned agenda:
Provides a calendar view, which can be used to see planned tasks (note: these are not
actual tasks but planned by a workflow planner or the IMS user him/herself).
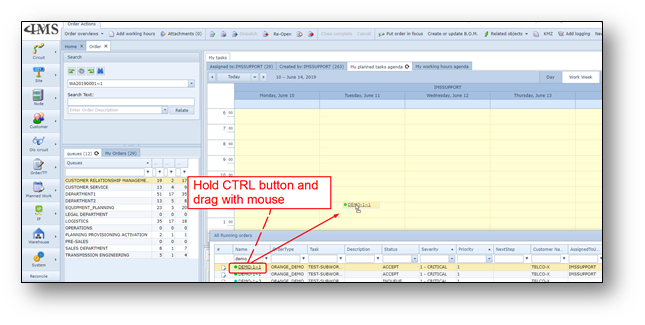
To add a task into the planned agenda, use the “all running orders” screen, and hold the CTRL button
and drag the task name to the correct place in the agenda.
Note: you need correct permissions.
Once the task is in the agenda, the task time can be increased by enlarging the task box in the
agenda (click first with left mouse on the task to select). The task can also be moved by clicking
and dragging to the correct place.
You can copy a task in the agenda, by pressing the CTRL button and drag it to other place in the agenda.
Tags @<username>:
This lists all messages that are done by colleagues for the IMS user (you) to read.
Note: if there are tags for the IMS user (you), this tab is not visible.
My working hours agenda:
This tab is an agenda view, which is used to manage your working hours.
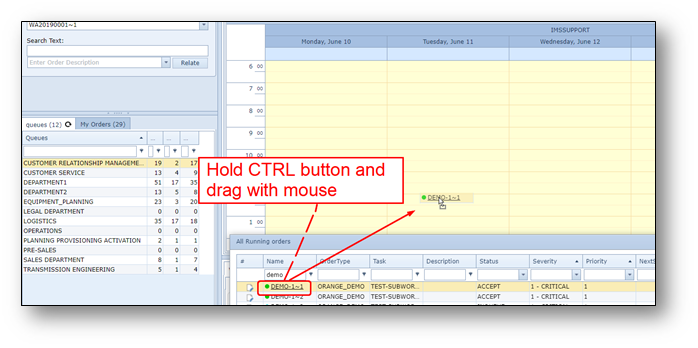
To add a task into the working hours agenda, use the “all running orders” screen, and hold the CTRL
button and drag the task name to the correct place in the agenda.
Note: you need correct permissions.
Once the task is in the agenda, the task time can be increased by enlarging the task box in the
agenda (click first with left mouse on the task to select). The task can also be moved by clicking
and dragging to the correct place.
You can copy a task in the agenda, by pressing the CTRL button and drag it to other place in the
agenda.
All tasks in queue <queue name>:
Two sub-tab pages:
All open tasks in <queue name>
Lists all current open tasks related to this queue
All closed tasks in <queue name>
Lists all closed tasks related to this queue
All main orders in queue <queue name>:
Two sub-tab pages:
All open main orders in <queue name>
Lists all current open main orders/TT related to this queue
All closed main orders in <queue name>
Lists all closed main orders/TT related to this queue
All main orders in queue <queue name>:
Lists all messages (log notes) related to tasks/orders/TTs in this queue.
Section 5:
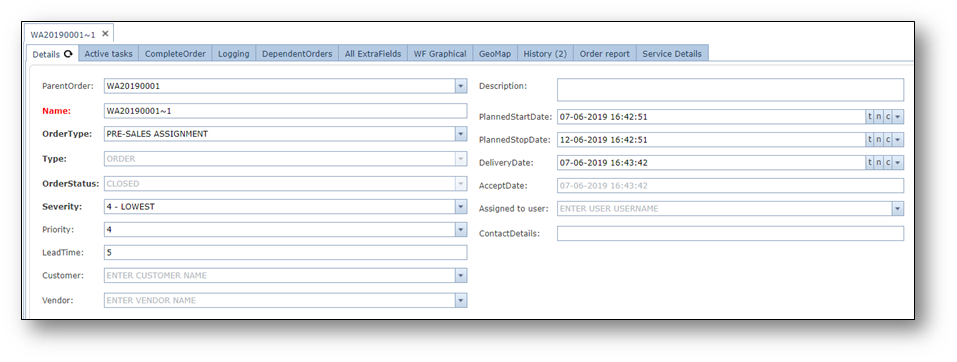
The lowest part of the screen shows the details of the opened order, trouble ticket or task.
The following tab pages are visible.
Details:
Shows the details of the main order, main trouble ticket or (sub) task of order/TT.
Active tasks:
Lists all the (current) ACTIVE subtasks of the main order, main trouble ticket.
Complete Order:
Lists all the subtasks (regardless of the task status) of the main order, main trouble ticket.
Log notes:
Lists all messages (log notes) related to the order/TT.
Dependent orders:
Lists all the upcoming subtasks that are dependent on the closure of the current active tasks.
All extra fields:
Lists all the fields related to this order. This tab may not be visible if you don’t have permissions
to view all fields.
WF Graphical:
Provides a graphical view of the order.
GEO map:
Provides a geographical view of objects related to this order. Of course, only visible when there
are objects related with geographical information.
History:
Lists the historical actions related to this order. Who did what when.
<Customized Order tabs>:
IMS Admin users may create additional tab pages and fields, for specific order type tasks.
Such tab pages may appear in the screen.
These fields normally need to be filled in by the IMS user who is responsible for the task, before closing it.
Create new order
To create a new order, press New -> Order, see screenshot below

A pop-up form appears:
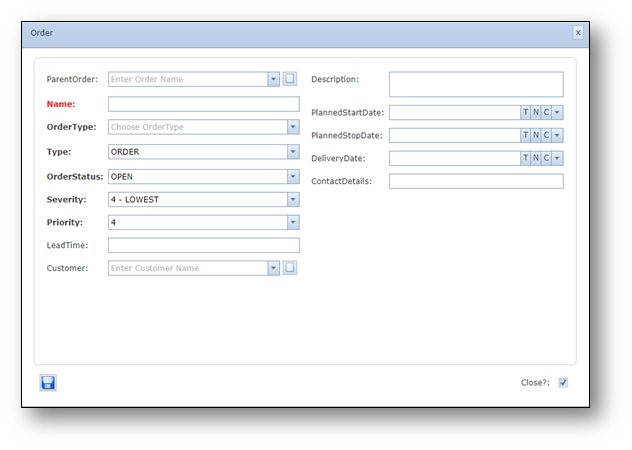
Fill in the following details:
Parent Order |
Ordername of the parent order (only use when creating a sub order) |
Name |
Name of the order / Trouble Ticket |
OrderType |
Order/Trouble Ticket (process) type |
Type |
“Order” or “Fault” (Trouble Ticket) |
OrderStatus |
Status of the order, default is “OPEN” |
Severity |
Severity of the order/TT, default is 4-LOWEST |
Priority |
Priority of the order/TT, default is 4 |
Lead time |
Leadtime of this order/TT |
Description |
Description – free format field |
PlannedStartDate |
Planned start date, date when order is planned to be started |
PlannedStopDate |
Planned stop date, date when order is planned to be finished |
DeliveryDate |
Date when order must be delivered to customer |
ContactDetails |
Contact details related to this order. |
Press save.