Introduction
When considering using any TNM system in the USA and Canada, one must be aware of the geographical nature of their telephone numbers. These numbers typically contain two standard prefixes: NPA and NXX.
NPA stands for Numbering Plan Area. This is also known as an area code, which is a three-digit number that identifies the phone service region. Each state is assigned one or more 3 digit codes.
For example:
The Canadian province of Manitoba has two NPA or area codes: 204 and 431.
The state of New Hampshire in the USA has one NPA of 603, whilst the state of New York has nineteen different NPAs.
NXX refers to the three-digit code forming the second part of a US 10-digit phone number (digits 4 to 6). This code is also known as the "central office code" or "exchange".
Each NXX is assigned to one phone company. If we consider that the 4 remaining digits can produce up to 10,000 numbers, phone companies were assigned numbers in blocks of 10,000. However, more recently, NANPA (North American Numbering Plan Administration) has been breaking up NXX blocks into groups of 1,000.
A useful source of area code information can be obtained from NANPA whose URL at the time of writing this document is:
https://www.nationalnanpa.com/index.html
We will now learn how to set up and use VC4’s TNM feature.
There are 4 main steps to follow in using TNM:
1.Telephone Number Range Type: Creating a new or selecting an existing one
2.Telephone Number range: Filling in the required supporting customer information
3.Set up the block ranges or sub ranges – (10,000 block or subranges of 1,000)
4.Assigning individual telephone numbers from those blocks to customers
We can consider the first 3 steps as part of an administrative role, whilst the last step is more of an end user assignment process.
Create a new TNR
|
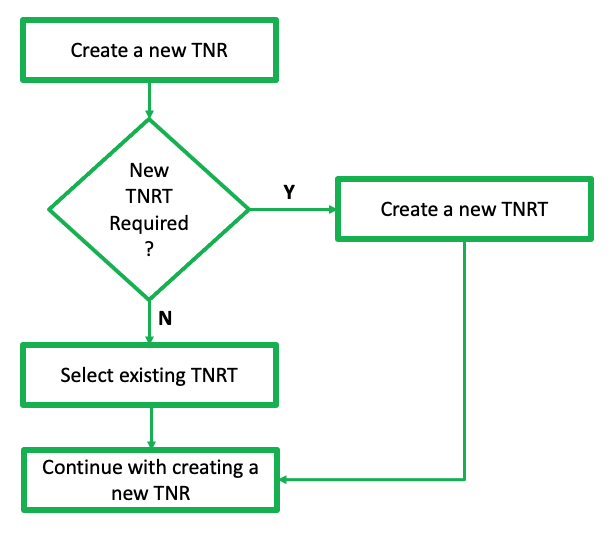
This section can take two possible routes, depending on the option chosen at the TelephoneNumberRangeType (TNRT) field. If a new TNRT is required, then there is a separate chapter for this process, after which you will return to complete this TNR section. |

From either of the TelephoneNumberRangeForm Actions tab:
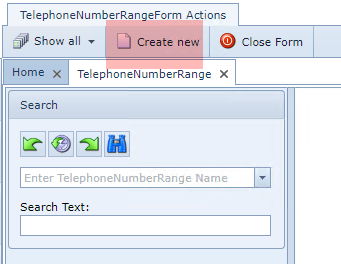
Unopened form

Current opened form
▪Click on the Create New icon - which will open up the Create new TelephoneNumberRange popup window
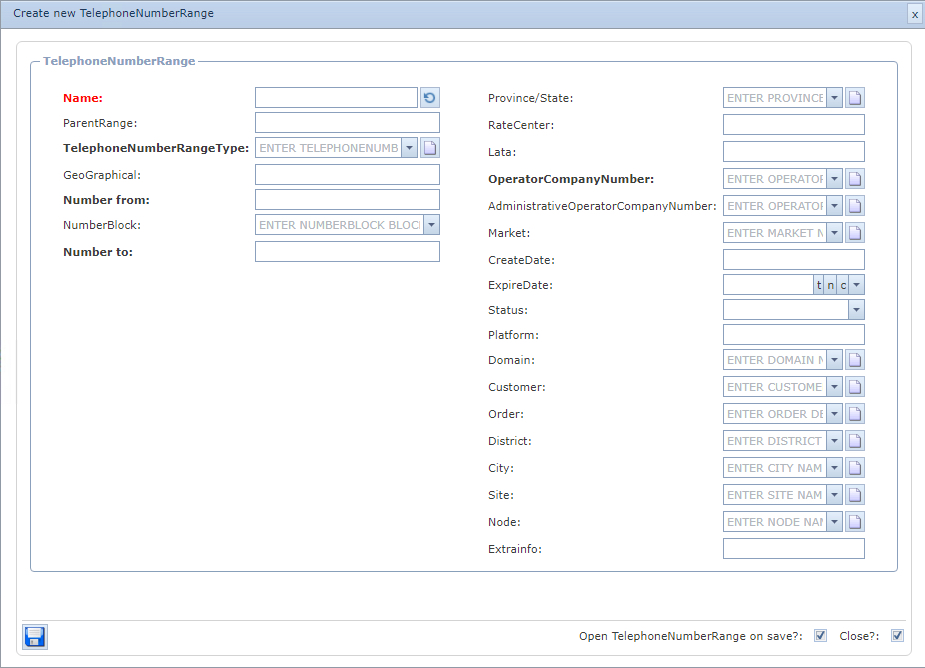
▪Fill in the required fields of information, in particular any mandatory ones:
Name |
Option to auto generated from the Name Template field under the Telephone Number Range Type - (leave this until the number range has been selected, and it will be auto completed according to the Name Template established during the TNRT setup process) or manually typed in according to your standard naming convention |
||
Parent Range |
This will be auto-completed if this range is a sub-range |
||
TelephoneNumberRange Type |
Search and select from the existing list, or Create a new instance by clicking on the new icon
|
||
GeoGraphical |
Auto derived from the TNRT selection |
||
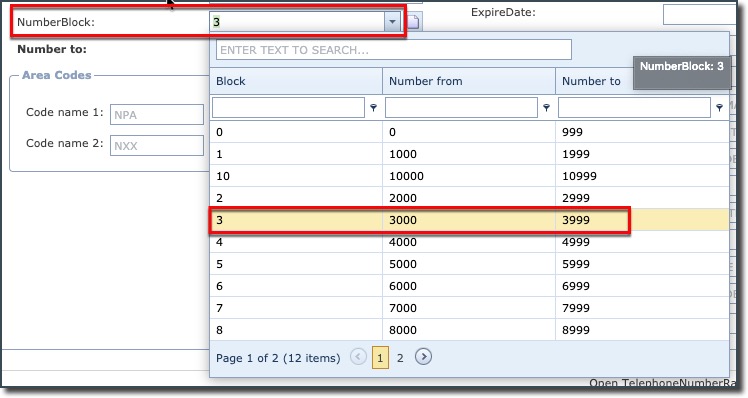
The following 3 fields are related to the number blocks required, and although the Number from and Number to fields can be manually set, it is common practice to select a range from the NumberBlock drop down list: oK block (K = 1000 numbers) oA block (A = 10,000)
|
|||
NumberBlock |
select a K or A block as required |
||
Number from |
auto populated from NumberBlock selection |
||
Number to |
auto populated from NumberBlock selection |
||
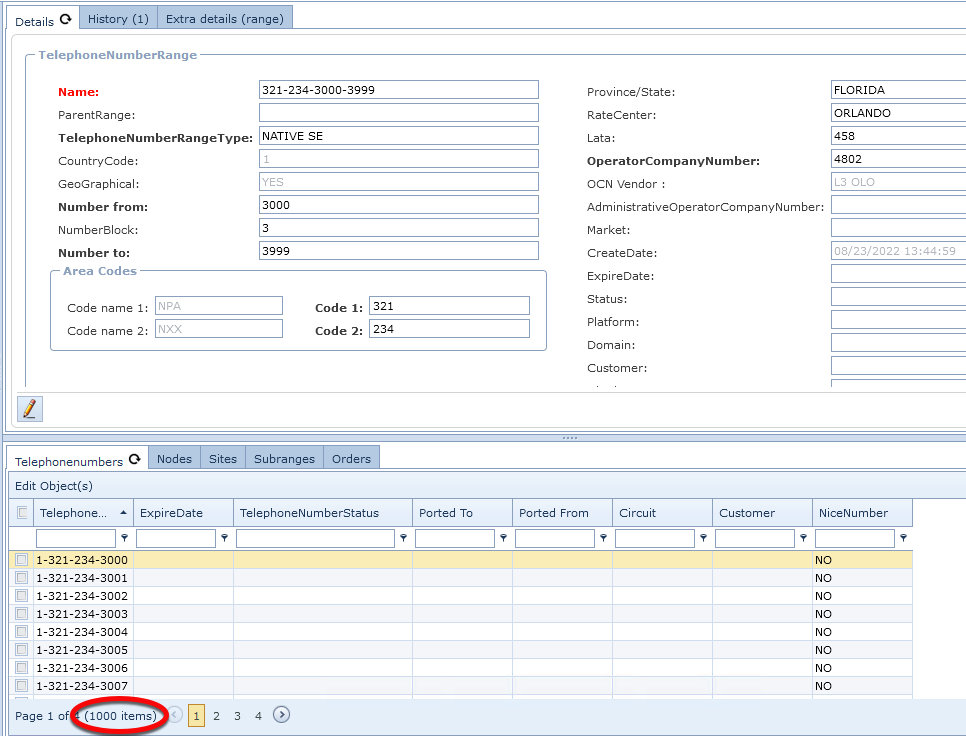
In this screen shot, a K block has been selected. Further on in this document there is a section on using an A block of numbers.
|
|||
Code name 1 |
In this example ... NPA - derived from the associated TNRT |
||
Code name 2 |
In this example ... NXX - derived from the associated TNRT |
||
Province / State |
Province or State in a Country |
||
|
|||
LATA |
Local Access and Transport Area. Geographical areas that usually, not exclusively, relate to Market Areas and some cross state boundaries. Rule: a LATA must be linked to a Rate Center for the LATA field to display valid instances in its dropdown for subsequent selection. If a LATA is not available in the dropdown field for selection, then one must be created - refer to the section called LATA or Rate Center on how to relate these objects. |
||
Rate Center |
Rate Centers are used within the assignment, routing, and rating/billing databases in the telephony industry. Rule: a Rate Center must be linked to a Province/State for the RateCenter field to display valid instances in its dropdown list for subsequent selection. If a Rate Center is not available in the dropdown field for selection, then one must be created - refer to the section called LATA or Rate Center on how to relate these objects. |
||
Operator Company Number (OCN) |
Operating Company Number - A four-character code assigned by the National Exchange Carrier Association (NECA) to any telecommunications provider. Specifically used to identify CLEC and Reseller usage data. Also known as Company Code. Rule: an OCN must be linked to a Vendor for the OCN field to display valid instances in its dropdown for subsequent selection. If an OCN is not available in the dropdown field for selection, then one must be created by clicking on the New icon at the end of the OCN field … this will open up the Create new OCN popup window. |
||
OCN Vendor |
OCN name |
||
Administrative Operator Company Number |
Administrative OCN |
||
Market |
This is a user defined field that further categorizes a range of numbers according to a company’s business case i.e., by region like South East or in accordance with the company's business case |
||
Create Date |
Optional - System date and time stamp is the default |
||
Expire Date |
Optional - user defined expiry date |
||
Status |
Optional - drop down list provided - used for TNM Ranges and Telephone Numbers. New statuses can be created on the fly from this field when first creating a new TNR. |
||
Platform |
Optional - user defined field |
||
Domain |
Optional - drop down list provided - Domain is accessed from the IP module and can be modified and added to. Domain is related to other IMS objects, other than IP. |
||
Customer |
Optional - drop down list provided |
||
District |
Optional - drop down list provided - District is accessed from the City feature under the Site module and can be modified and added to. |
||
City |
Optional - drop down list provided |
||
Node |
optional - drop down list provided |
||
Extra Info |
Optional - user defined field |
||
▪Click on the Save icon in the lower left of the window
This will generate 1000 telephone numbers as shown in the following example screen shot.