The Floorplan form supports the management of the floor space of the sites. Via a graphical view of
the site users can manage the floor space.
It includes:
•Floor plan details, like:
oFloor tiles
oTile height
oTile width
oFlexible labeling of the floor tiles
oRacks/Cabinets
oNode/Power/DDF/ODF shelves
oWalls, entrances
•Rotation of objects on the floorplan
•Drag and drop functionality
•Zoom in/out
•Copy to Microsoft Visio
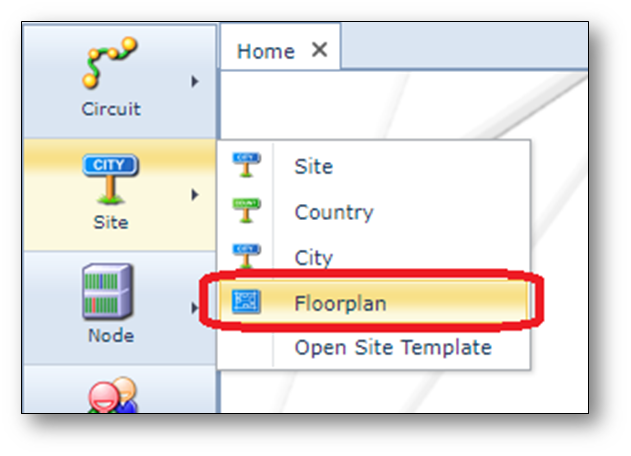
Open Floorplan Form
To open the Floorplan form, use the site menu and chose option “Floorplan”
 .
.
Find existing floor plan
To find an existing floorplan, use the search field on the left of the screen.

Floorpan Actions button bar
When a site/location is opened, the following button bar is visible.

Explanation of the fields:
Create SVG |
Export the floorplan to a SVG-file |
New rack |
Create a new rack |
New ddfodf |
Create a new DDF/ODF |
Add Tile |
Add a tile to the floorplan |
Cable circuitPath |
Open the cable circuit path for selected cables on the floorplan |
Show selected racks |
Open a selected rack to view the equipment inside |
Print the floorplan drawing |
|
Close Form |
Close the Floorplan form |
Create a Floorplan
1.Open site/location via the search field
2.Under the Details of this Floorplan fill in the floor tile
labeling, for example:
•XAxisLabel = |1|2|3|4|5|6|7|
•YAxisLabel = |A|B|C|D|E|F|G||
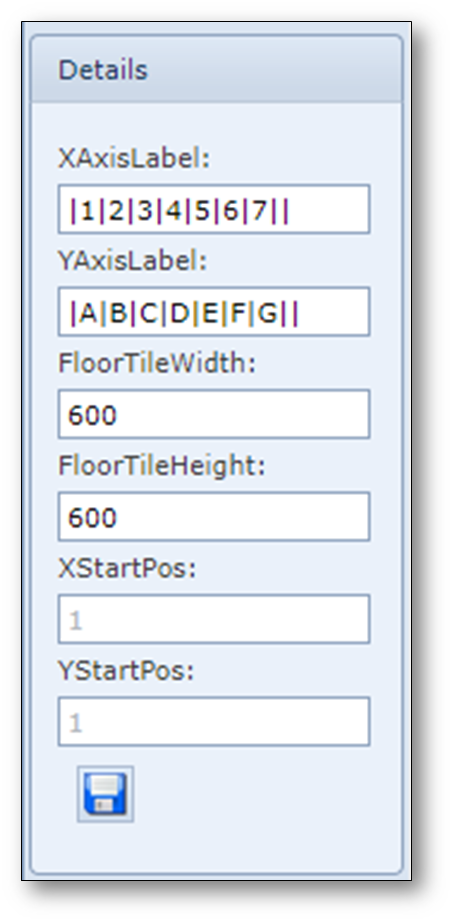
3.Click the “Save” button and the grid will be changed to the new details.
Edit a Floorplan
To edit/create a floor plan:
1.Click the pencil button to enable the edit mode of the floorplan and the edit Floorplan button bar will appear.
Screenshot: Edit floorplan
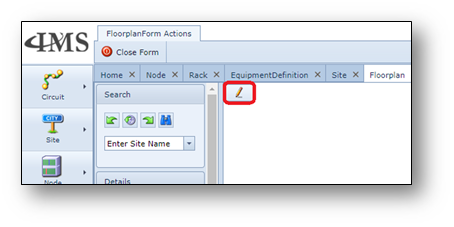
The following button bar becomes visible in the floorplan layout area.

Explanation of the fields from left to right:
Edit |
Edit floorplan on/off |
Grid |
Grid mode on/off |
Snap to grid |
Snap to grid on/off |
Show cable trays |
Show cable trays on/off |
Arrow |
Selection mode |
Line |
Line drawing mode |
Rectangle |
Rectangle drawing mode |
Ellipse |
Ellipse drawing mode |
Polygon |
Polygon drawing mode |
Polyline |
Polyline drawing mode |
Line thickness |
Adjust line thickness of selected object |
Line color |
Adjust line color of selected object |
Fill color |
Adjust fill color of selected object |
Opacity |
Adjust opacity of selected object |
To front |
Bring object to the front |
Save |
Save changes |
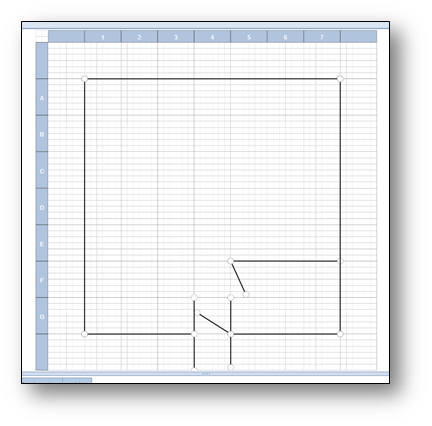
2.By using the buttons (e.g. “Line”) on the edit Floorplan button bar the walls can be created.

Screenshot: example Floorplan creating walls
To add racks on the floorplan:
3.in the list of Items on Site tab at the bottom of the Floorplan form, right click the row with the rack name you want to add, for example “RACK001” and select “Add to floorplan”.
4.Move (drag and drop) the rack to the correct position on the floorplan.
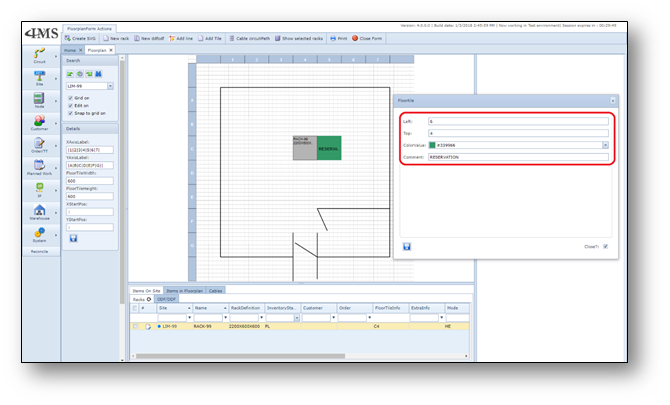
To make a comment on a floortile:
5.Click the button “Add Tile” to make a reservation on a position on the floorplan.
6.Fill in the details on the pop-up screen, for example:
Left |
6 |
Right |
4 |
ColorValue |
Pick any color you like |
Comment |
Reservation |