The Rack form is where racks or cabinets that hold the equipment and patch panels are registered.
Open Rack Form
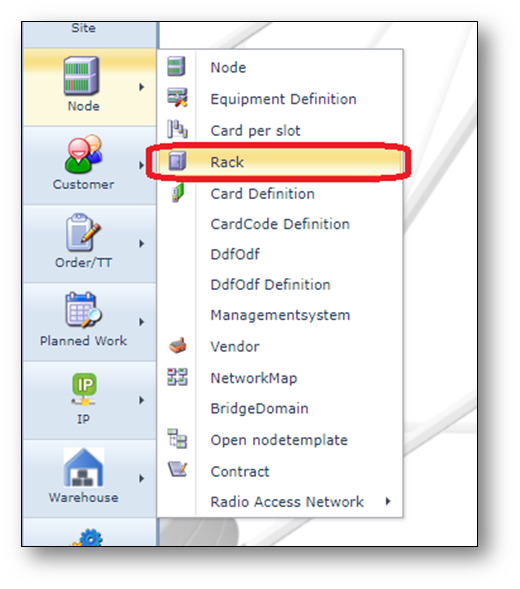
To open the Rack form, use the node menu on the left of the screen, see screenshot below.
Find Rack
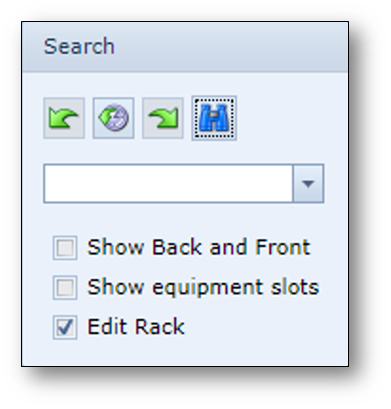
To find an existing rack use the search area on the left.
The rack will be opened, with the graphical layout of the rack in the middle of the screen.
On the left side summary details can be found
On the right side, more rack details can be found in different tab pages.
Rack Actions button bar

Create svg |
Create SVG-file of the rack layout |
Relate to Order |
Relate rack to the order in focus |
Remove rack from floorplan |
Remove the rack from the floorplan |
Remove from Rack |
Remove objects from the rack |
Add to Rack |
Add objects to the rack |
Create new Rack |
Create a new rack |
New rack def |
Create a new rack definition |
Copy |
Copy the rack name |
Delete |
Delete the rack |
Close Form |
Close the Rack form |
Create a Rack
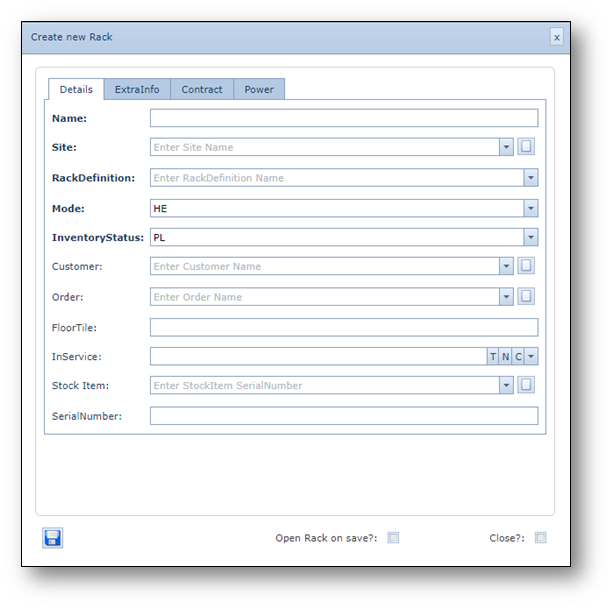
1.Click the “Create new Rack” button on the Rack Actions button bar.
2.Fill in the details in the pop-up form
3.Click the “Save” button to create the new rack.
Screenshot: Create new Rack
Add equipment in the Rack
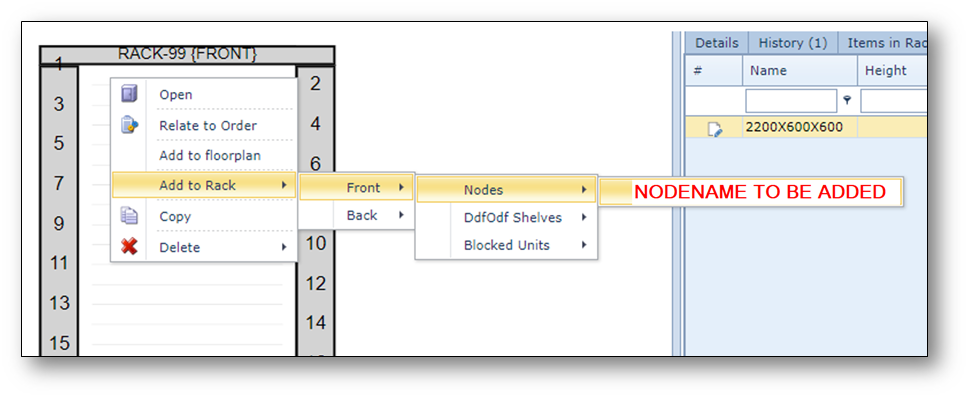
1.Right click in the rack and select Add to Rack > Front > Nodes > <name of the rack> to add this node to the rack.
Screenshot: Add to Rack
2.In the search area, enable the option “Edit Rack” and click the “Search” button to enable edit mode.
3.Drag and drop the shelf in the rack to the correct height.
