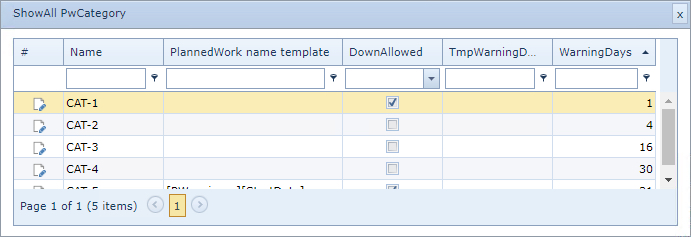
Showing existing PW Categories
▪Click on an existing Planned Work instance
▪Right Click on the PwCategory field - this reveals a dropdown list of options
▪Select PwCategory, an then select ShowAll PwCategory
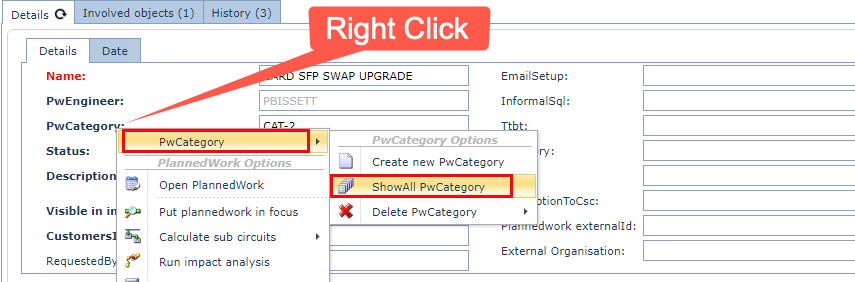
This will open up a ShowAll PwCategory popup window
Creating a new PW Category
A Planned Work Category (PW Category) can be created by:
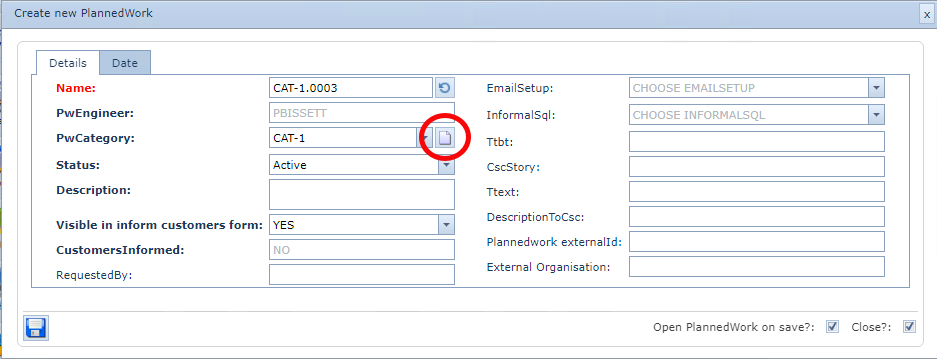
▪Clicking on the New icon in the PwCategory field when creating a new Planned Work instance - shown in the next screenshot
or
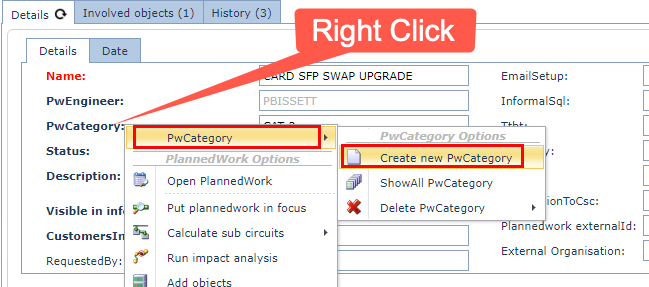
▪Right Click on the PwCategory field in an existing Planned Work instance - this reveals a dropdown list of options
▪Select PwCategory, an then select Create new PwCategory
Whichever way you access the create new PW Category, the following popup window will appear
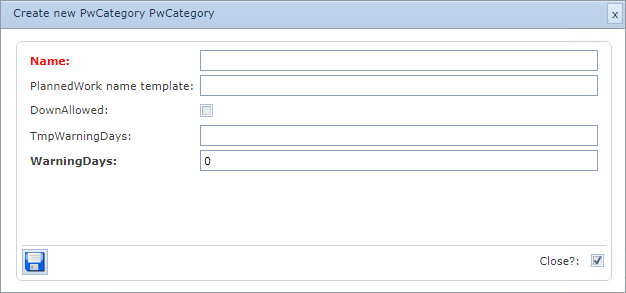
Fill in the fields of information required, the following table gives a brief description of the available fields:
Name |
The name for this Planned Work Category i.e., CAT-2 |
PlannedWork name template |
Option to create a name template for Planned Works containing this PW Category - refer to the name template section below for more details.
|
DownAllowed |
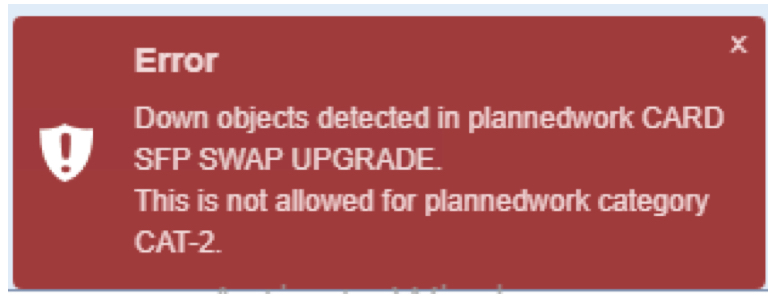
Option to notify a Planned Work user if a Planned Work instance is to give a warning message in the lower right corner of the GUI should any Circuits be in a down state as a result of running a Planned Work instance using this PW Category. I.e., if DownAllowed is not checked, then a warning message will be given as in the following screen shot.
Consider this feature as an early warning for planners or engineers, so that Circuits showing is a down state can be looked at and a reroute or backup circuit can be put in place before going ahead with the Planned Work.
|
TmpWarning Days |
Of no use currently - possible use in a future release
|
WarningDays |
a. Sequence order of the PW Category instances - numerical field b. Of no other use currently - possible use in a future release
|
Planned Work Name Template
Here are some more options that can be used in setting up a name template for Planned Works, apart from the usual placeholders in square brackets, a serial number is often useful at the end of the template name i.e., to avoid duplicates.
All properties of the Planned Work entity can be used in the naming convention.
Example: [NUM:4:100:7:700:1]
1 4=LENGTH OF THE NUMBER STRING
2 100=START OF THE RANGE. (OPTIONAL)
3 7=SIZE OF THE STEP WITHIN THE RANGE (OPTIONAL)
4 700=END OF THE RANGE. (OPTIONAL)
5 1 = 0 OR 1 0=COUNT PER SITE (Default) 1=CONTINUOUS COUNTING (OPTIONAL)
6 1 = 0 OR 1 0=COUNT PER CITY (Default) 1=CONTINUOUS COUNTING (OPTIONAL)
7 1 = 0 OR 1 0=COUNT PER DEFINITION (Default) 1=CONTINUOUS COUNTING (OPTIONAL)
8 1 = 0 OR 1 0=CONTINUOUS COUNTING (Default) 1=COUNT PER CUSTOMER (OPTIONAL)
9 1 = 0 OR 1 1=COUNT ONWARDS FROM LAST KNOW OBJECT
Here's an example of a Planned Work template that includes:
oThe Planned Work name
oThe Planned Work category
oA serial counter
[PWname]-[PWcategory]-[NUM:3:1:1:5000:1]
The separator used here is a minus symbol. Separators are optional and help to interpret the name template.