Trenches are the lengths of underground runs that are initially dug up and contain the cable ducts. Trenches are then back-filled and are typically found under footpaths and roads in built up areas, and in IMS they can also represent aerial trenches between telegraph poles. In IMS, trenches are modeled using the Circuit object and given the speed name of Trench.
Trench Preparation
Before creating trench connections apply the following 3 steps:
1.Ensure that appropriate endpoints are available:
oCable Entry Points i.e., at building and BTS sites
oManholes / Handholes (MH)
oTransition Points (TP)
oPoles
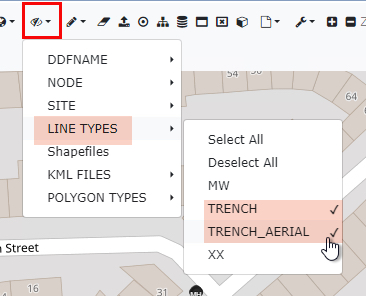
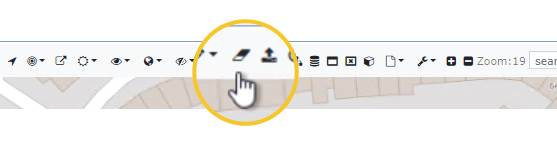
2.It is also advisable to remove from the map view, any non trench related equipment, connections, and site icons as this will make it easier to locate and select the required trench elements. Use the Remove All as well as the individual selections from the Show Icons and Line Types option in the Network Map button bar (crossed-out eye icon).
The following 3 screen shots show how to remove and include objects using the Network Map options button bar:
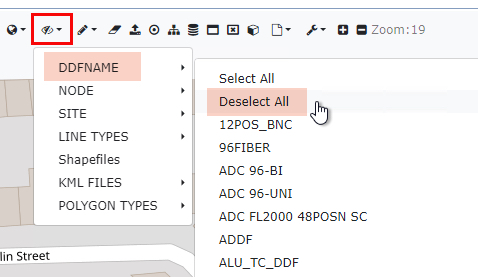
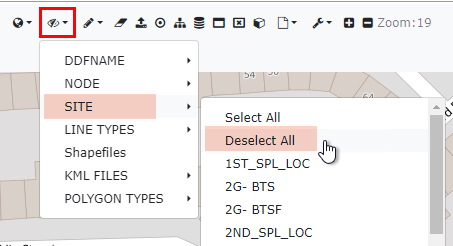
Ensure that all Trench appropriate Node and Line type icons remain.
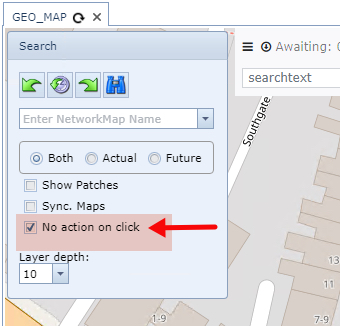
3.Disable the action on click
In the Search Area of the Network Map, enable the No Action on Click option. This will prevent the selected object's popup window from appearing every time it is selected when creating the Trench circuit.
Create a Trench Circuit
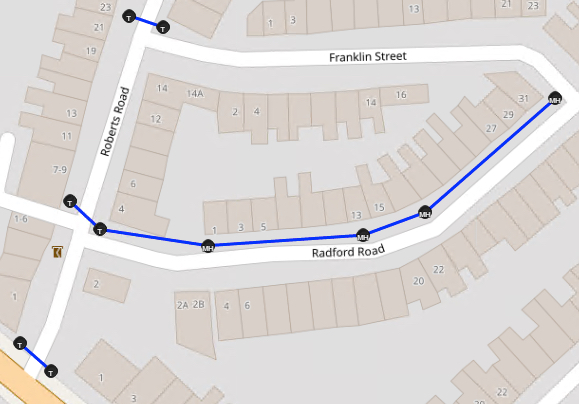
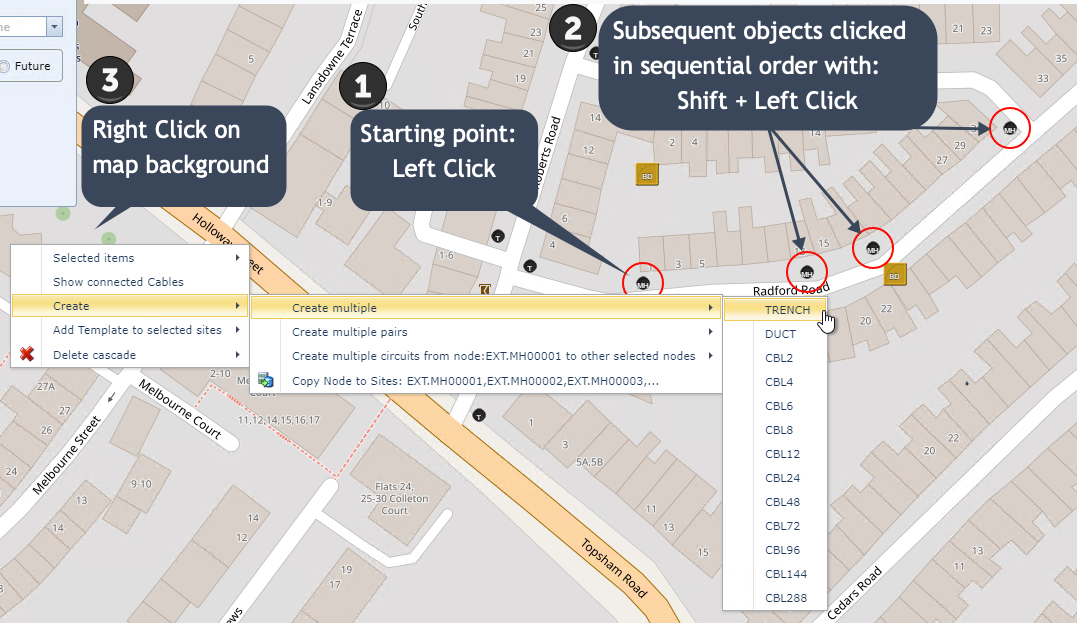
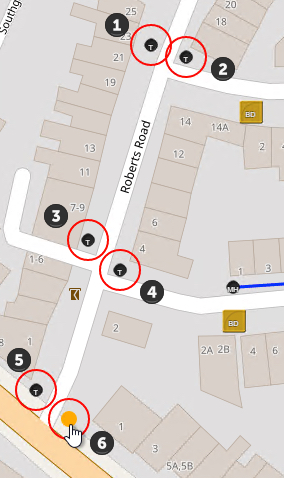
Many Trench connections can be created in one go. Typically a trench run will traverse many endpoints along its route so it is quicker to create them all at once rather than individually. In this example, Trench connections will be created between 4 Manholes.
From the Network Map:
If you don't see the Create Multiple option, as seen in the above screen shot, make sure that you haven't selected incorrect objects on the map i.e., a DDF or Site icon |
|
Left click (only) on the object representing the starting point of the Trench - in this example a Manhole. A red circle will appear around each object selected. |
|
In sequential order, hold down the Shift key and left click on the remaining objects - as stated earlier, a red circle will appear around each object selected. |
|
Right Click anywhere on the Network Map background - then from the drop down menus select: Create | Create Multiple | TRENCH |
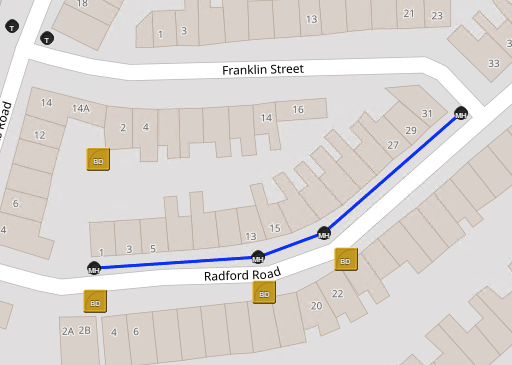
The result should look similar to the screen shot above.
Create Parallel Trenches
Another Trench connection use case is where multiple Trenches are required in a so called parallel formation. Consider the case where short trenches are required to join transition points beneath a road. Essentially this method creates a series of many trenches that are not sequential but rather parallel.
From the Network Map:
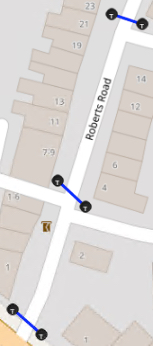
IMS will use the sequence of entry points selected to determine between which Transition Points the TRENCH connections will be created. With reference to the next screen shot, IMS will create Trench connections between the Transition Points at 1 and 2, then 3 and 4, and 5 and 6, as this was the of selection sequence. |
In this example Transition Points are used.
▪Left click on the first entry point (1), a red circle will appear
▪Hold down the Shift key and left click on the remaining Transition Points in the sequence required
▪After selecting the last entry point, Right click on the map background - not on any IMS object
this will open provide a drop down list of options:
▪Select the following: Create | Create multiple pairs of TRENCH
▪Then select the required Trench type from the final drop down list

Selecting the first option - Create multiple of TRENCH - will connect all selected devices in one continuous line which is suitable for a long run of trenches |
If the sequencing selection needs to be redone - then select the Clear Drawbuffer option from the Network Map ribbon
|
The result should look similar to the following screen shot:
Other Trench routes can now be joined with these parallel Trenches to complete the task.